Last updated: January 22, 2024
Logging is an essential part of any application, no matter the tech stack or service to which you deploy. When things go wrong in production, logging might just save you from going blind when trying to fix the issue.
In this post, you’ll see how to implement logging for your .NET 5 Asp.NET app on Azure Web Apps.
Before We Start
There will be requirements if you want to follow along. We’ll assume you have the following:
- A GitHub account
- An Azure account
- At least some familiarity with C#/.NET
- Familiarity with the command line
- The .NET SDK installed on your machine—by the time of this writing, the latest version is .NET 5.0, but 6.0 should come out in the next couple of months.

Before we dive into the specifics of implementing logging for your .NET 5 ASP.NET app on Azure Web Apps, it’s beneficial to understand the types of logs that Azure provides. Azure offers a variety of logs to help you diagnose issues:
- Application Logs: These capture information your application writes to STDOUT and STDERR.
- Web Server Logs: These provide information on HTTP requests and can be useful for identifying patterns or issues with your web server.
- Detailed Error Logs: These logs provide detailed information when an HTTP request receives an error code, such as a 500 Internal Server Error.
- Deployment Logs: They provide information related to the deployment of your app, which can be useful for identifying issues that occur during the deployment process.
Got everything you need? Then let’s get started.
First, You Need an App
To start, you’ll need an app hosted on GitHub. For brevity’s sake, I won’t walk you through the app creation. Start by going to https://repo.new to create a new GitHub app (the link will redirect you to the login page in case you’re not already logged into your GitHub account).
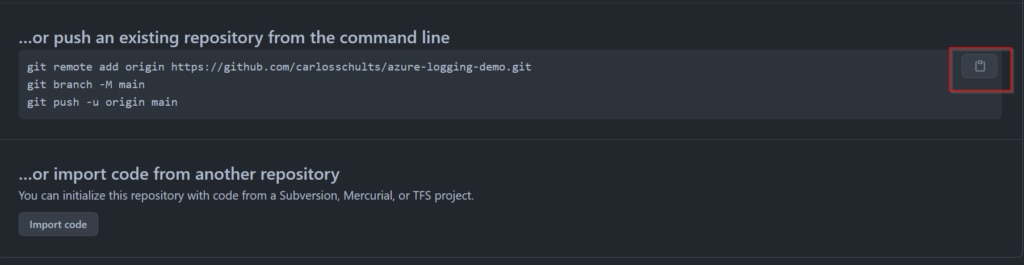
Give the repository any name you like. Then, on the page shown in the following image, click on the highlighted button to copy those lines to your clipboard. They’ll be useful in a moment.
Afterward, go to this repo on GitHub and clone it or download it as a ZIP file and extract it. This is the sample app you’ll use.
Now, access the cloned or extracted folder. If you cloned the repo, get rid of the original Git folder:
rm -r -fo .git # if you're on Windows/ powershell
rm -rf .git # if you're on Linux
The commands above cut the cord to the original Git repo. You can now create your own repository with those files:
git init
git add --all
git commit -m "Initial commit"
Finally, paste the lines you copied earlier to push the files to your remote repository:
git remote add origin https://github.com/<YOUR-USERNAME>/<YOUR-REPO-NAME>.git
git branch -M main
git push -u origin main
Configure the Deployment to Azure
Now it’s time to configure continuous integration and continuous delivery (CI/CD) to Azure. Start by going to the Azure portal.
Creating an App
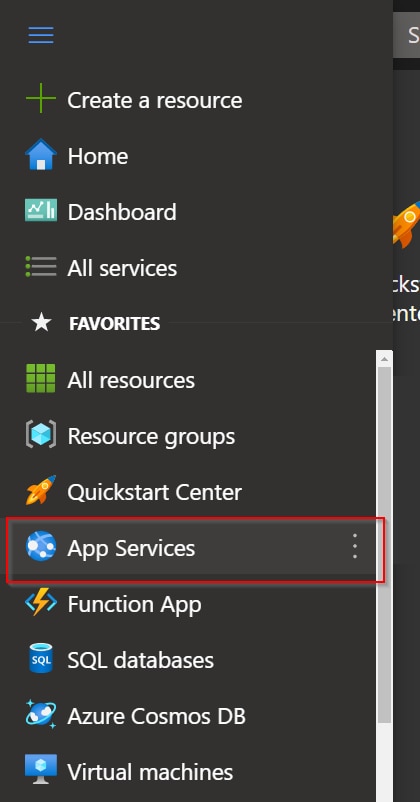
Click on the main menu and go to App Services:
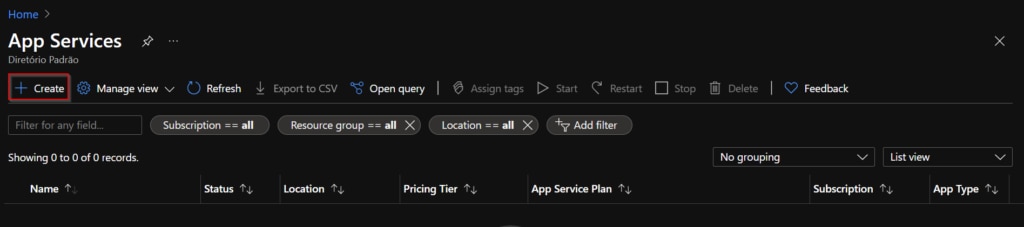
Then, on the new screen, click Create:
You’ll be taken to yet another screen, where you’ll be able to configure your new web app:
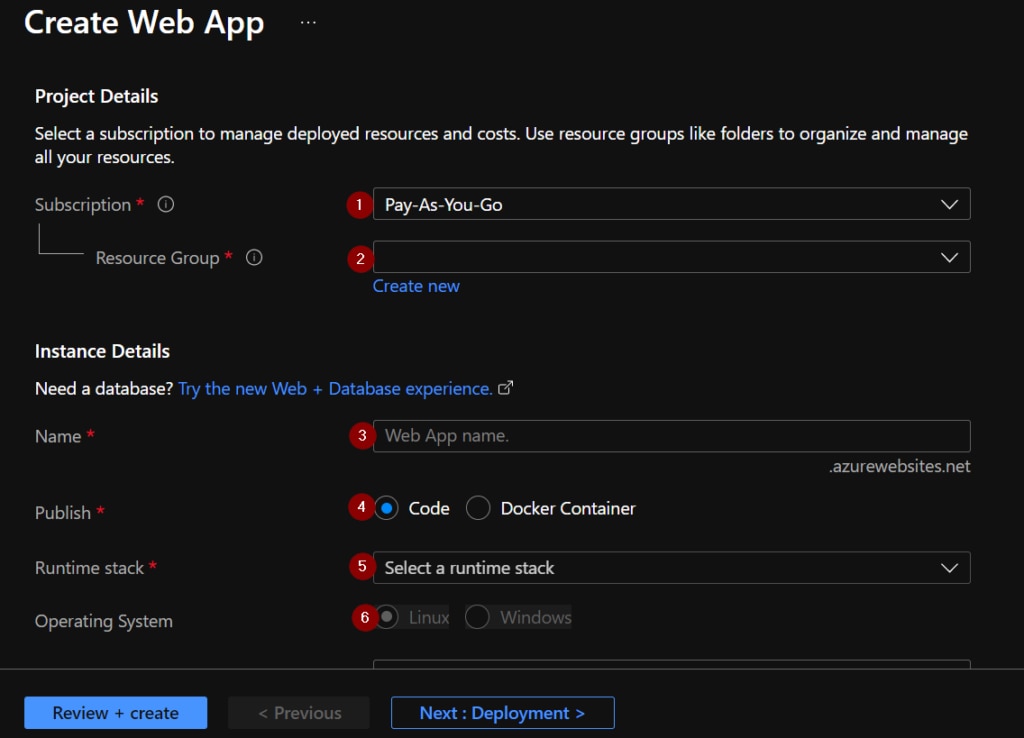
Configuring the Application
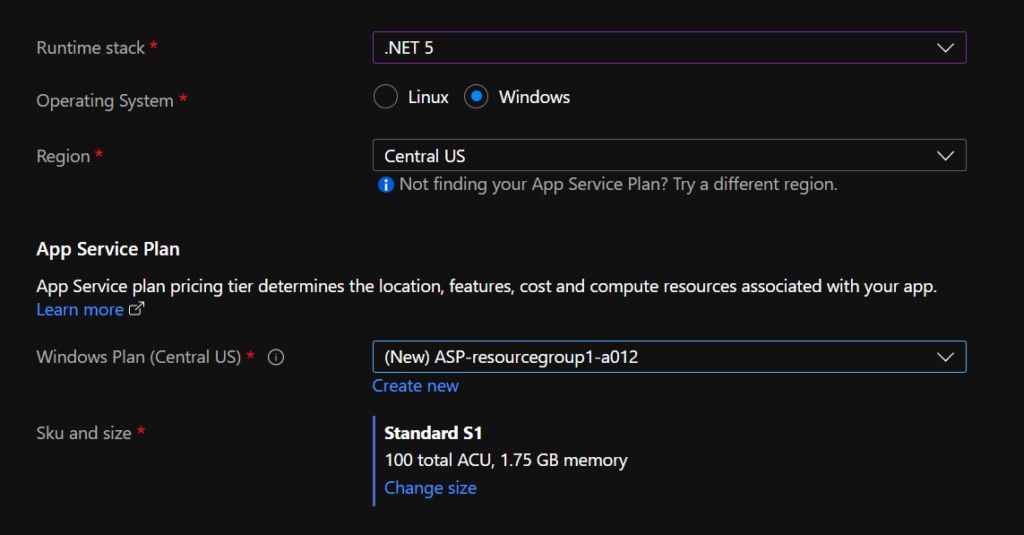
Configure the app as follows:
- Subscription. Choose between the subscriptions available for you.
- Resource group. Choose the resource group, creating a new one if needed.
- Choose a name for your web app. The name isn’t very important; pick something short and easy to remember.
- Select a runtime stack. In my case, I picked .NET 5.0.
- Choose an operating system. I picked Windows.
Then, configure the remaining options. Choose a region for your app, an App Service Plan, and an SKU and size.
Then, click on Next:Deployment to configure the next step.
Configuring Deployment
The deployment configuration itself is quite easy:
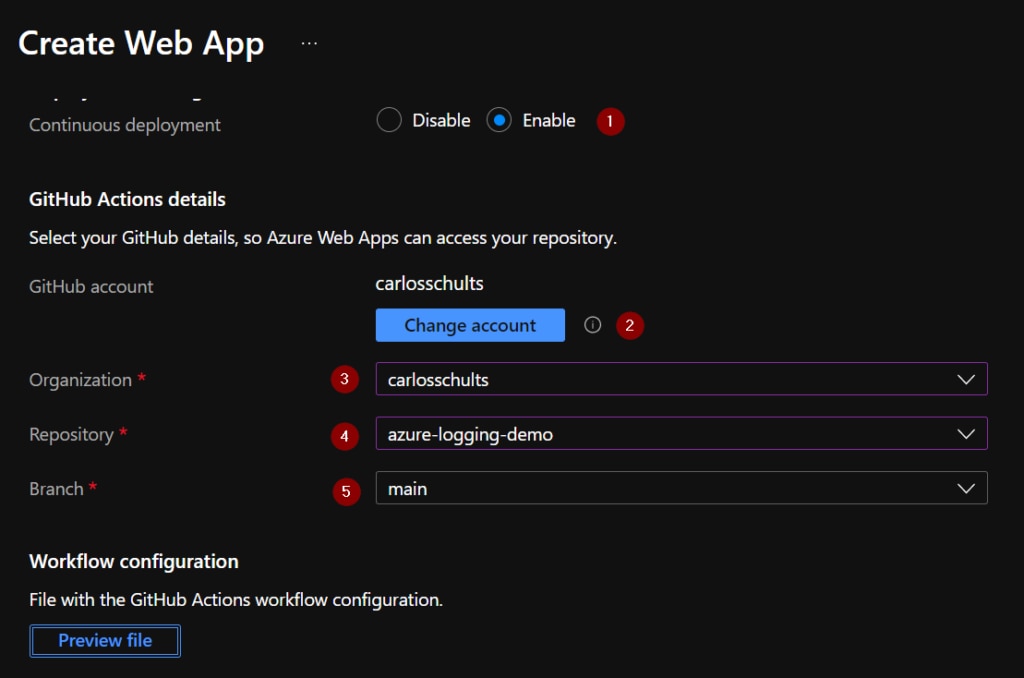
- First, start by enabling continuous deployment.
- Then, select the GitHub account you’ll use, giving the necessary permissions to Azure.
- Afterward, select the organization. If you don’t have any organizations, this will be your GitHub username.
- Then, select the repository you want to associate with the Azure app.
- Finally, select the branch.
If you click on Preview file, you can get a glimpse of the GitHub action configurations Azure will generate for you:
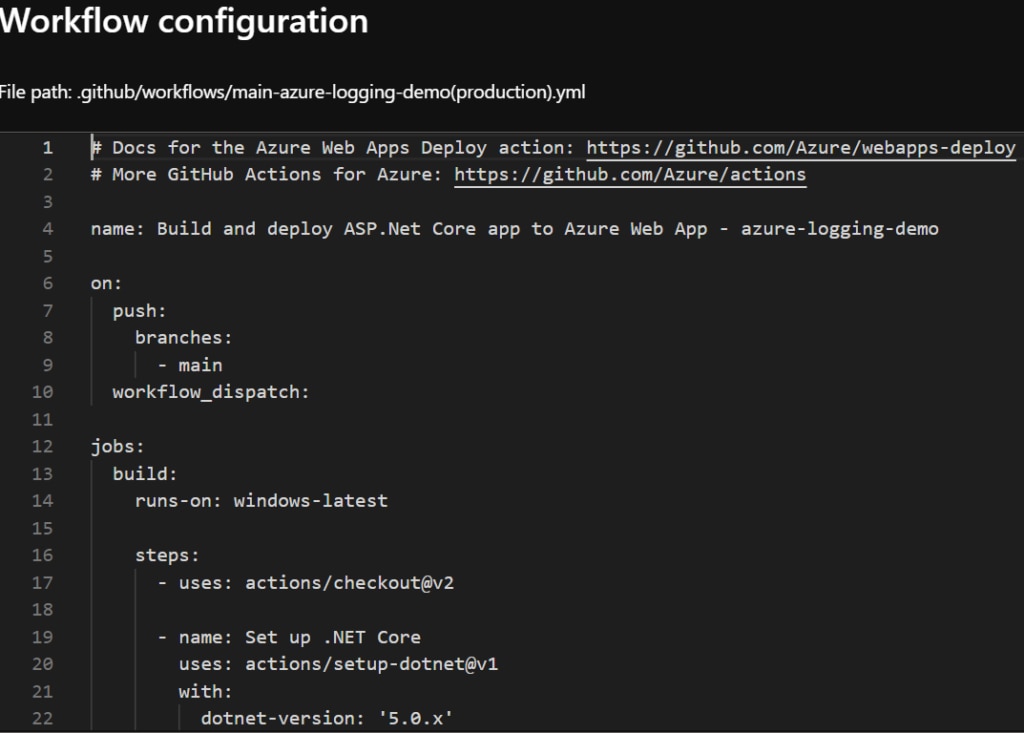
If everything looks fine, you can click on Review + Create and then on Create. This will trigger a deployment.
Troubleshooting a Potential Problem
You should be able to navigate to your app’s URL and see the application. If you see a generic Azure page, something’s wrong.
In this case, go back to the portal. On the left navigation bar, click on Configuration—the first item under Settings:
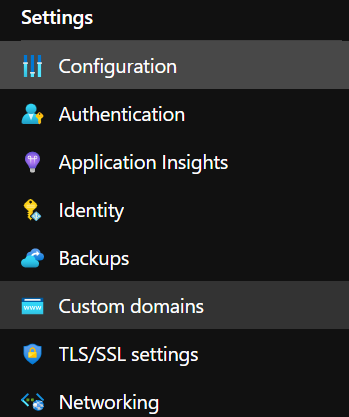
On the new screen, go to the Default documents tab.
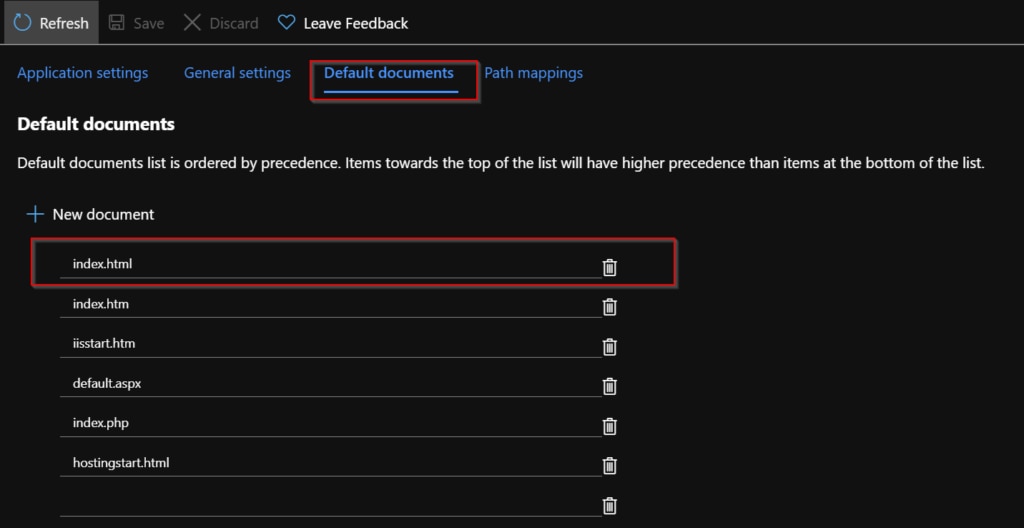
You’ll see a list of default documents. Make sure the first item is index.html. This should make the problem go away and ensure your actual app homepage is shown.
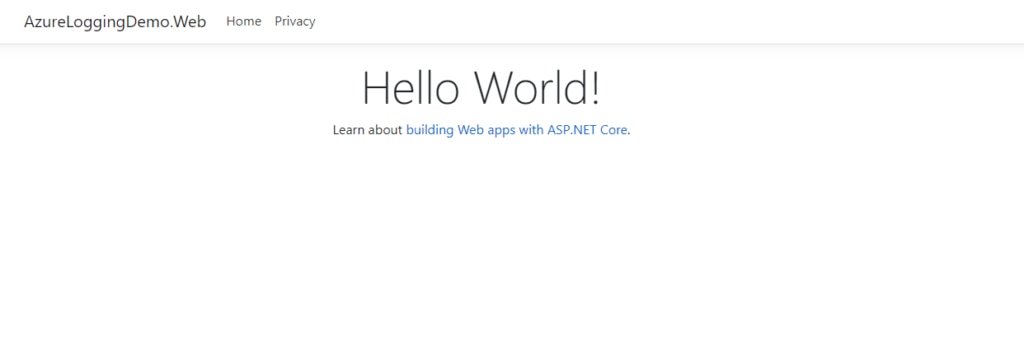
To check whether the continuous deployment is really working, make a change to the app and see if the live app is updated. In other words, in my case, I went to the view for the Index action on HomeController and changed the greeting to “Hello World!”:
Why Logging is Different in the Cloud
Cloud environments create new challenges and opportunities when it comes to logging. Unlike traditional on-premises setups, cloud services are ephemeral and can be scaled horizontally, meaning your logs can be distributed across numerous instances. This necessitates a centralized logging solution to aggregate logs from all these instances for easier monitoring and analysis.
Additionally, cloud services like Azure provide built-in logging and monitoring solutions which can significantly simplify the setup and maintenance of your logging infrastructure.
Now, with a better understanding of the cloud logging landscape, let’s see how we can enable logging in our .NET 5 ASP.NET app deployed on Azure Web Apps.
Enable Logging
Enabling logging on Azure will require three simple steps. Step #1 is simply activating the setting on Azure Portal.
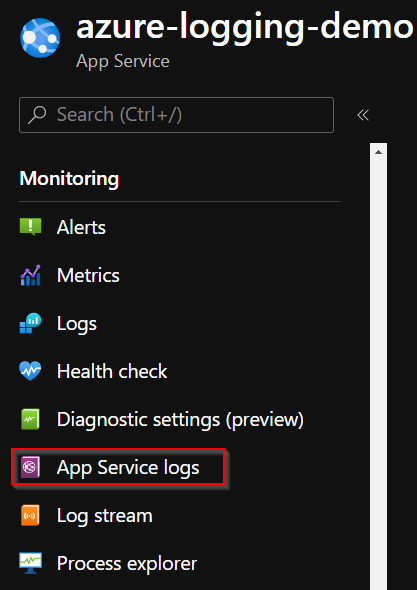
Go to your app’s page on the portal. On the left menu, click on App Service logs under Monitoring:
You’ll be taken to a screen where you can configure logging. Make sure you activate Application Logging (Filesystem). You’ll see a message saying, “Click here to install the ASP.NET Core site extension to enable Application Logging.”
Upon clicking on the message, you’ll be prompted with a yes-no dialogue. Click yes to continue. You’ll see a message saying the extension was successfully installed. Click on the Save button to finish the configuration.
For the next step, we’ll make the necessary changes to the code. Start by installing the necessary NuGet package.
# starting from the project's root folder
cd src/AzureLoggingDemo.Web
dotnet add package Microsoft.Extensions.Logging.AzureAppServices
Now for the code. Open the Program.cs file using Visual Studio Code or another text editor. Add the following line to your list of usings:
using Microsoft.Extensions.Logging.AzureAppServices;
using Microsoft.Extensions.DependencyInjection;
Now, edit your ConfigureHostBuilder method so it looks like this:
public static IHostBuilder CreateHostBuilder(string[] args) =>
            Host.CreateDefaultBuilder(args)
                .ConfigureLogging(logging =>
                    {
                        logging.ClearProviders();
                        logging.AddConsole();
                        logging.AddDebug();
                        logging.AddAzureWebAppDiagnostics();
                    })
                .ConfigureServices(services =>
                {
                    services.Configure<AzureFileLoggerOptions>(options =>
                    {
                        options.FileName = "first-azure-log";
                        options.FileSizeLimit = 50 * 1024;
                        options.RetainedFileCountLimit = 10;
                    });
                })
                .ConfigureWebHostDefaults(webBuilder =>
                {
                    webBuilder.UseStartup<Startup>();
                });
Finally, we’re ready to log. Go to your HomeController and change its constructor to this:
public HomeController(ILoggerFactory loggerFactory)
{
    _logger = loggerFactory.CreateLogger<HomeController>();
    _logger.LogWarning("This is a WARNING message");
    _logger.LogInformation("This is an INFORMATION message");
}
If you run or debug your application, you’ll see the messages displayed on the console.
Now, commit and push all your changes:
git commit -am "Add logging"
git push
That’s pretty much it. Now you can simply visit your application using the URL you can see on your Azure dashboard. On the portal, click on “Log Stream” immediately below “App Services log” and you’ll see the log messages in real time.

Make the Most Out of Your Logging
Logging is one of the most important processes developers and teams can adopt when it comes to monitoring their apps. After all, software is complicated, and once it goes live, you never really know what could happen.
When things go wrong, having a proper logging strategy is often the difference between a quick and decisive investigation or a long and aimless one.
In this post, you’ve seen how to set up logging for an ASP.NET MVC application hosted on Azure. So, what should your next steps be?
Education is always a great answer to this question. For instance, you might want to take a look at this useful post about best practices for C# logging.
Another suggestion: start looking into application log aggregation. Besides logging to regular destinations, such as a file or the console, you can also send your logs to a file aggregation tool such as SolarWinds® Papertrail™.
With log aggregation, you can collect logs from many disparate sources across your organization, bringing them together for better visibility, quicker and easier troubleshooting, and the possibility of extracting valuable insights from them. Here’s a useful tutorial on how you can send your C# logs to Papertrail using NLog.
This post was written by Carlos Schults. Carlos is a consultant and software engineer with experience in desktop, web, and mobile development. Though his primary language is C#, he has experience with several languages and platforms. His main interests include automated testing, version control, and code quality.
You might also want to check out the SolarWinds azure ad log analytics